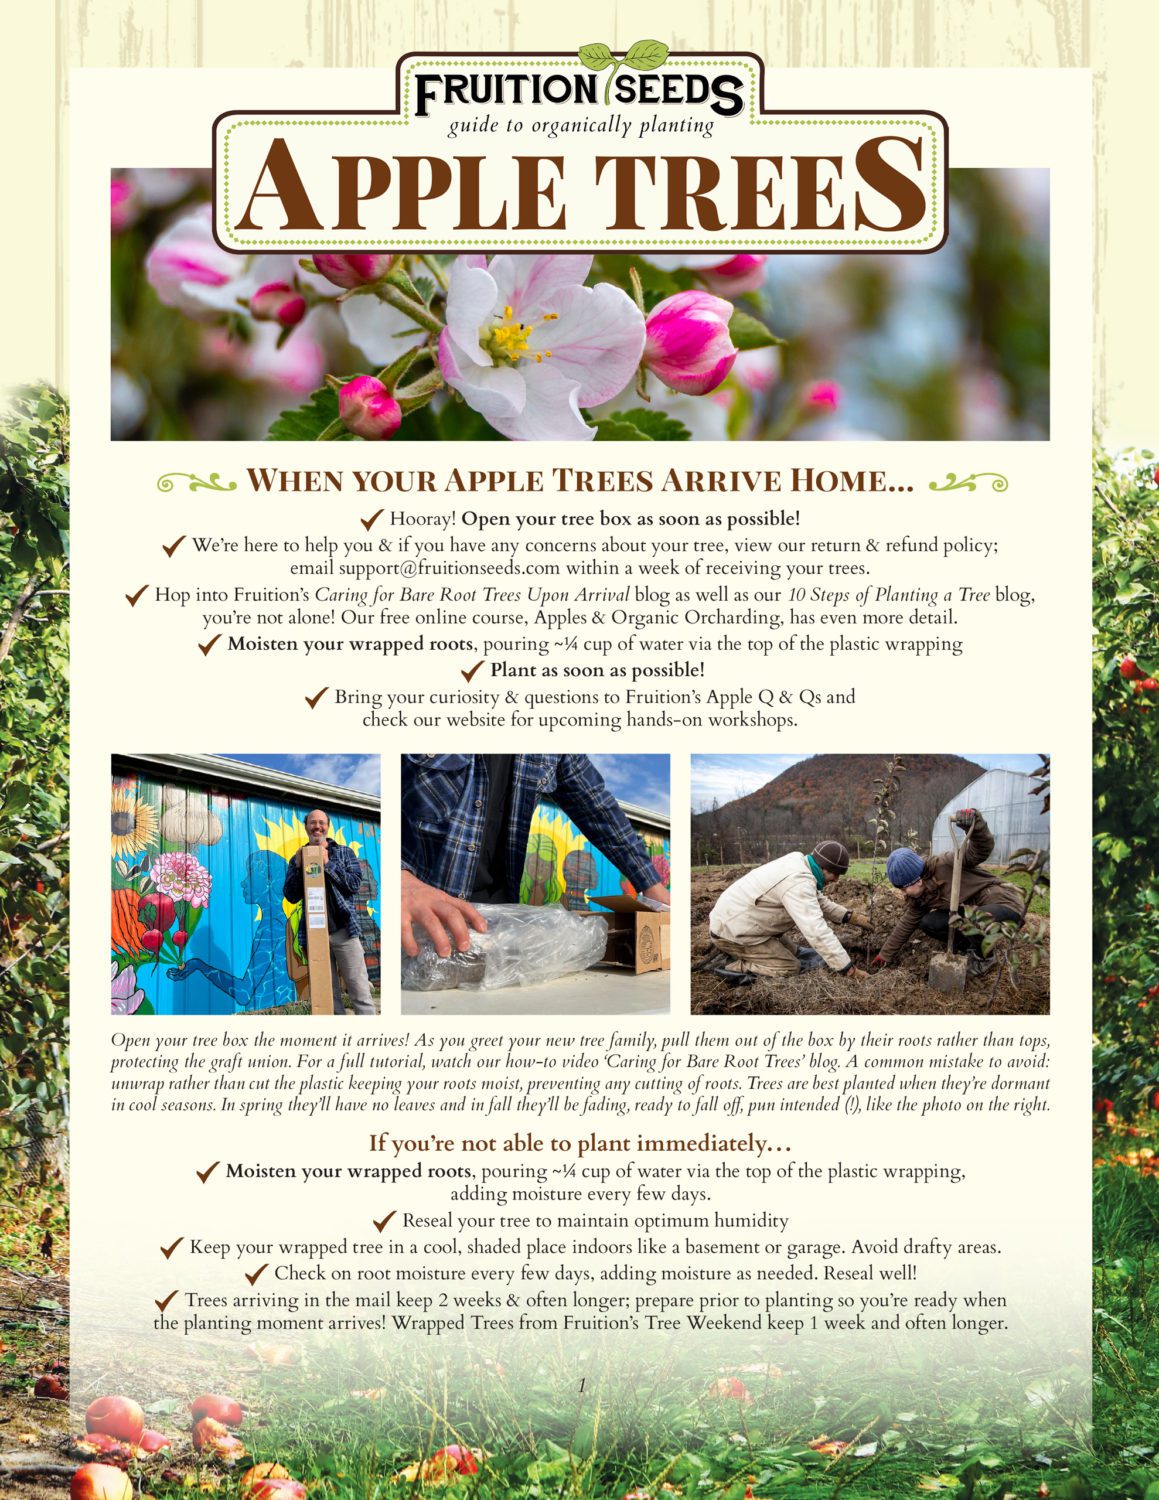
 |
Large Soil Blocker Soil blocks make seed starting easier and way more successful. We have used this blocker for nearly 20 years as professional growers and it is straight-forward for the novice gardener, as well. Every seed you sow will be grateful for growing in a soil block rather than a cell or pot and here’s why: there is more soil (and nutrients) per volume, so each plant is bigger and healthier in impressively little time. Being constricted by plastic sides causes plants to become root-bound, but plants in soil blocks are surrounded instead by air,so the roots naturally “prune’ themselves and never become root-bound, dramatically reducing transplant shock. And, it’s fun to use!
As well as surprisingly easy.
Making your soil blocks is fun and straight-forward. First, moisten your Potting Mix (this is our mix we use at Fruition) and push block maker into the mix several times, turning back and forth, until blocks are full of soil. (We often use our fingers to make sure there are no air gaps, especially at the top of each block.) Lift the soil blocker and set into a tray, squeezing the handle to release your four gorgeous soil blocks. Each block has a perfect little dimple in the top, ready to be sown with seed. (If they’re not gorgeous, and they won’t be the very first time, it’s easy enough to start over.)
We love these Inserts for our large blockers that allow us to tuck our Mini-Blocks, quickly and easily, right into our large ones, ideal for that first potting up stage. The mini-blocks allow for optimal use of your precious Heat Mat space.
Have fun! And your plants will agree: soil blockers are the best way to grow transplants.
Tip: When soil blocking, make sure your potting mix is more moist than you may think necessary to help them form fully. Also, warm water is more comfortable for you & seeds about to germinate.
Ideal Soil for Soil Blocking: Fruition's DIY Potting Mix
Simple & Successful Indoor Seed Starting
Soil Blocks in 5 Easy Steps
Materials
~Potting mix (organic, compost-based mix grows the healthiest seedlings)
~Tub to easily contain potting mix
~Warm water (tap is perfect)
~Seeds (organic seeds grow the most abundance)
~Soil blocker (we use a mini and 2-inch blocker)
~Mini inserts (so your mini soil blocks will perfectly nest in the large blocks)Small pan of water (to rinse your blockers in)
~Bottom trays
1. Before you begin, gather your materials from the list above.
2. In a sizable a tub with a flat bottom, moisten your potting mix with warm water. Potting mix for soil blocks is wetter than for cell trays. A squeezed handful of mix should not drip. Your sense of proportion will come with experience. :)
Grow Like a Pro: I use warm water to moisten my potting mix. It makes soil blocking more comfortable and fun!
3. Fill your soil blockers! Fill your soil blocker by pressing it into the potting mix, pushing down several times and twisting a bit, rocking from side to side. Your goal is to have solid blocks of soil. I often hand-pack the soil into each block to be sure there are no remaining air pockets. (This is especially important if your large soil blocker has the mini inserts attached, because the top of the block has a thinner, more fragile edge.) Once you’re confident your blocks are packed tight, scrape any excess soil on the bottom off the your hand, a butter knife or the edge of your container.
Grow Like a Pro: Pack your soil blocker as densely as possible. The upper corners of the block are the most prone to crumbling. Use your fingers to pack your potting mix deep into the soil blocker before the blocker is mostly full. This is especially critical when using the mini-inserts, whose edges are narrower and thus more fragile.
4. Place your blocker on your bottom tray. Release your blocks by pressing the spring-loaded handle and raising the blocker in a smooth, even motion. Voila! (If your blocks are not solid, toss them back into your tub of potting mix and continue on. They will be better next time!)
Grow Like a Pro: Practice makes perfect. Soil blocks are no exception. Your first soil blocks will likely make you laugh. They’ll slump, perhaps crumble. Throw them back and make more! You may learn the hard way that standing ability alone doesn’t prove their density; blocks that aren’t dense enough will slump and crumble in the following weeks. Luckily, soil blocking is fun and forgiving. :)
5. Rinse your blocker. To make consistently perfect soil blocks (and for the biggest payoff from your efforts), your soil needs clean contact with the blocker.
**For more tips and easy-to-follow instructions for starting seeds at home like a pro, check out our eBook: Rise & Shine: Starting Seeds With Ease by Petra Page-Mann**
|
|
 |