Everyone loves dahlias.
Who loves to dig them?
And I agree, it’s not as glamorous as harvesting lush blooms as the August dew rises.
But with a little planning and a bit of experience, you’ll save many times the tubers you planted, surrounding yourself with breathtaking abundance for the coming season. Plus a few extra for your best flower friends!
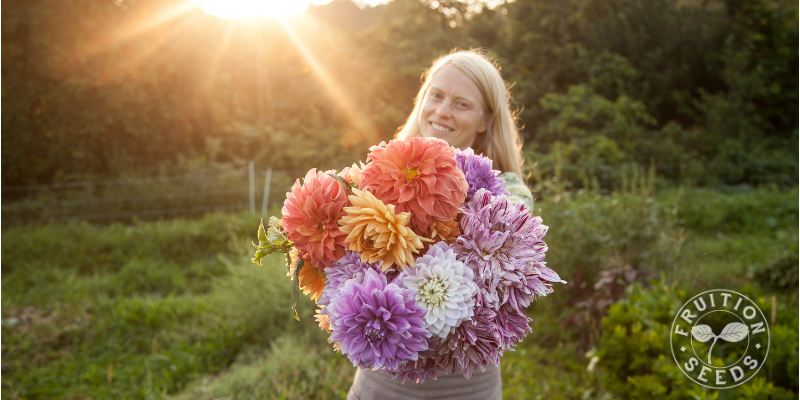
Storing your own dahlia tubers is a labor of love but so, so worth it and not too challenging, with the right tips and tools.
Why Dig Dahlia Tubers?
There are many reasons and this is my favorite: You’ll have so many more dahlias for next season (not totally but essentially) for free.
Tuber productivity varies between varieties, but you’ll harvest 6 to 25 tubers for each tuber you plant. Not all will have full eyes allowing them to grow a stem next spring, but you’ll easily harvest more than you planted, and likely a lot more. While dividing our dahlias, I had 18 perfect tubers to save from one single plant. If I get 6 from other varieties, I’m psyched. The variation is part of the fun.
Come spring, you’ll be glad you saved them — and so will your friends — if you’re sweet enough to share!
8 Steps to Successfully Storing Dahlia Tubers
1. Wait Two Weeks After Frost to Harvest Dahlia Tubers
It’s ideal to harvest and store dahlia tubers that have gone into dormancy, so they’re not shocked by the transition of summer growth to winter storage. Two weeks after your first frost is the ideal time to harvest them: they’re well into dormancy yet haven’t been harmed by the cold. It’s often cold and blustery, so do your best to choose a day that suits your sanity.
2. Trim Back Your Dahlia Stems
Just before digging your tubers, trim each stem back most of the way to the ground. We like to leave five to six inches of the main stem so we have a ‘handle’ to hold as we lift and rinse them. Dahlia stems, like straws, are hollow, making them quickly susceptible to rot. Which is all to say, don’t pre-emptively trim stems before you’re prepared to dig.
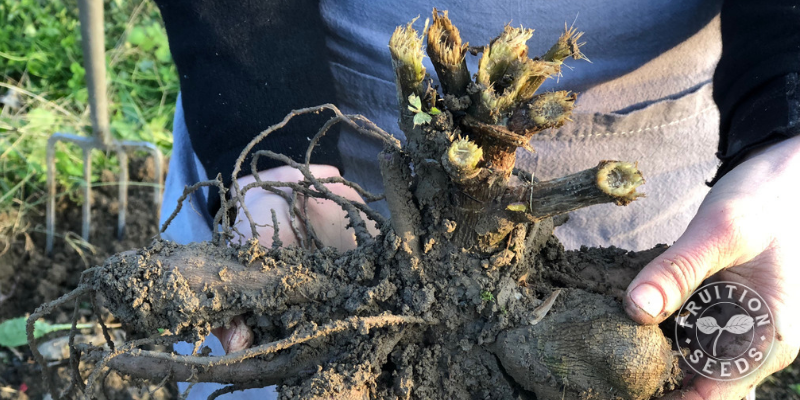
Dahlia stems are hollow and quickly rot when cut, so only cut just before you dig.
3. Dig Your Dahlias
If you have a choice (and often you don’t), dig your dahlias when it’s nice and warm (at least in a relative sense), when the soil is not totally wet. Since it’s deep into fall when we harvest here in Zone 5, the ground is often wetter than we’d like. But the soil isn’t likely to dry out until May, so we do the best we can.
A digging fork is infinitely more effective than a shovel, if you’ve got one. Either way, be sure to give your dahlias a wide berth. Each variety is unique: Some grow down, others grow out and some grow waaaaay out. Each tuber is attached to the central stem, or ‘neck.’ Especially as you begin to dig a new variety, dig in a wide radius so you break as few tubers and necks as possible.

Leave as much soil as you can in the garden, but resist shaking to protect the delicate necks.
Once lifted, loosen the soil that is easily left in your garden. Your goal is to break as few necks as possible, so resist the instinct to shake them. Use your fingers to ply soil away from the tubers. We often use the dahlia stems themselves to release more soil, especially when it’s cold and wet.
Gently tuck your dahlia tubers into a tote or wheelbarrow, as if you were handling eggs, bringing them to their next step in the process.
Before we go on, you have a choice to make: Divide Now, !n the Spring, or Not at All…
Choosing to Divide Dahlias in Fall:
You’ll likely get more tubers that you would if you divided in spring, since the eyes are much more visible. They’re that much easier to cut, since they’re fresh, as well.
Choosing to Divide Dahlias in Spring:
You’ll likely get less tubers to re-plant, because the eyes will be so receded by winter’s dormancy. Also, cutting dahlias that have survived the winter is like cutting leather. I have friends who simply quarter them in spring and that satisfies them greatly.
If you don’t divide your dahlias in fall, lift each plant and remove all extraneous soil from the tubers in the garden. Put them, fully intact, in a fully closed plastic bag and store them in the coolest, darkest place in your home that won’t freeze.
Choosing Not to Divide Your Dahlias:
Always an option, and it’s simple enough. You won’t be able to propagate nearly as many new plants, but if you don’t need many this may be the easiest choice.
4. Rinse Your Dahlia Tubers
Pretend you’re washing fresh eggs, delicate and fragile. Protecting the necks of each tuber is paramount. That being said, your garden hose on ‘jet’ is quite ideal to rinse them. Resist shaking them and handle them as little as possible. Washing them right in the grass by your compost is great; we spray them on a mesh metal table adjacent our compost. Your goal is to clean your tubers as thoroughly as you possibly can, making the dividing that much easier. Some varieties clean more quickly than others; gentle patience is one of the key virtues of digging and storing dahlias.
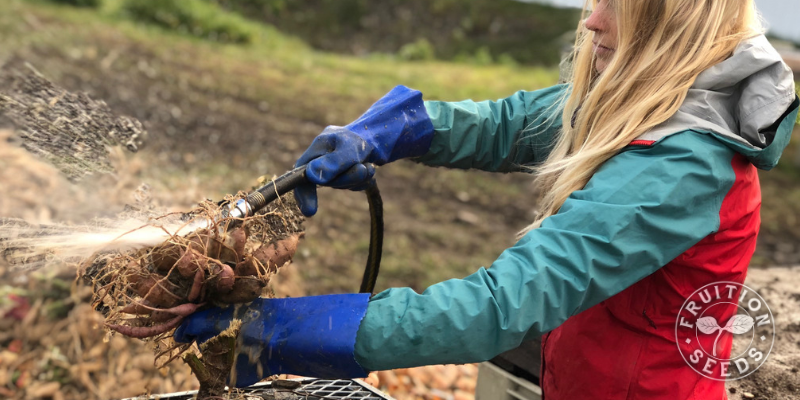
Wash your dahlia tubers as you would eggs, protecting each fragile neck.
5. Divide Your Dahlias
Once your dahlias are thoroughly rinsed, bring them into a warm, well-lit workspace to divide them. Here are the tools I have on-hand:
– A table at the perfect height to cut
– Large cabbage or another harvest knife, sharp as can be
– Pair of sharp pruners, sharp as can be
– Dahlia knife, aka hawk’s or bull knife, sharp as can be
– Bowl of water large enough to spot-rinse your dahlias
– Bowl or tray for your tubers ready to store
– Compost bucket at the ready
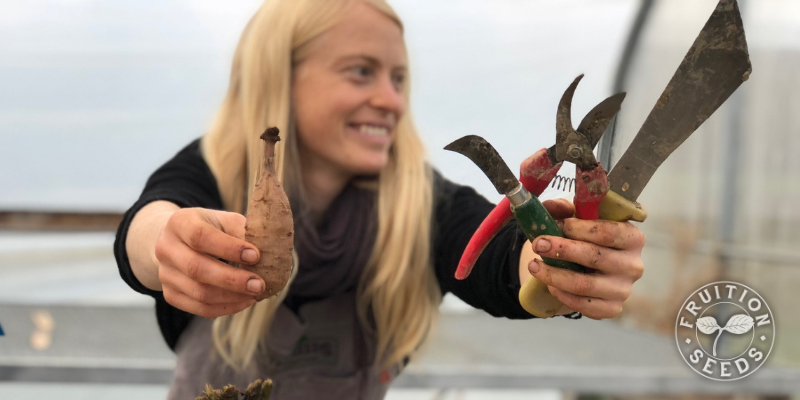
Look at that tuber with the glorious cluster of eyes! A hooked dahlia or hawks knife is an essential tool for easy tuber division.
Dividing dahlias is a marvelous puzzle. Crosswords and sudoku are not fun for me, but boy, a wheelbarrow full of dahlias to divide brilliantly is just the kind of problem I love to solve.
Here is the key to dahlia division…
To become a glorious dahlia next season, your tuber must:
– be larger than a ping-pong ball
– with a strong neck that is not broken, even a little,
– with an ‘eye’ on the stem-end; Without such an eye, your tuber will grow only roots, but not a shoot to grow up, forming leaves and blossoms.
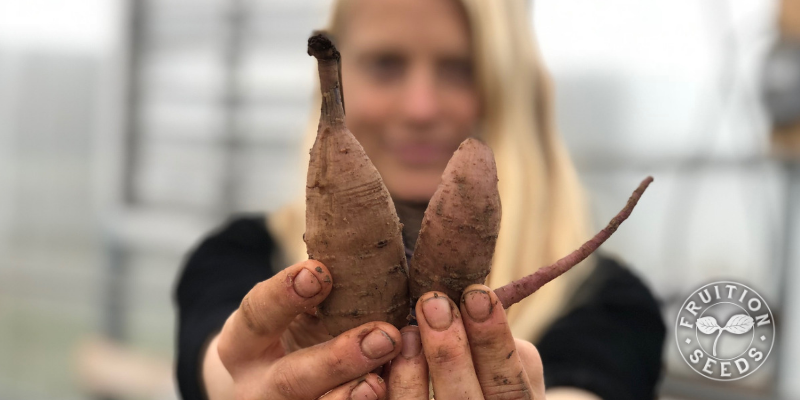
The tuber on the right is too narrow, it will most likely desiccate in storage. The middle tuber has no neck and no eye, so it won’t grow shoots next spring. The tuber on the left is absolutely perfect, with plenty of eyes at the end of a strong neck.
Start slow. Dahlia division is not to be rushed. Different varieties, with their unique tuber architecture and arrangement, are handled differently. Some varieties I mostly use my shears; others I rarely put down my dahlia knife. Learning the separate genius of each tool is part of the fun. Keeping your tools sharp and staying curious are the only imperatives.
6. Dust Your Dahlias with Sulfur
Once we divide all our tubers of a particular variety, we dip them into a bucket of powdered sulfur and vermiculite, providing an organic antifungal coat to prevent rot in storage. A spare dusting is quite ideal.
Dipping freshly divided dahlia tubers in vermiculite + powdered sulfur is a great organic approach to defying rot over the winter.
7. Pack them in Peat Moss
Tuck each tuber in a box with peat moss. It’s important that the box be fairly air-tight; we line our open-sided bins with plastic to ensure there is minimal moisture loss. Next, put down a one-inch layer of peat moss.
Here I’d like to add that I wish we could find a material other than peat moss for this step. Once we do, you’ll know! In the meantime, we use the same peat moss for many seasons, using it only for dahlia storage. Be sure it is very dry, though not bone dry.
On your one-inch layer of peat moss, lay your tubers so there at least an inch of space between each one. It’s important they don’t touch, so if one begins to rot it won’t spoil the rest. Keep adding peat moss, about an inch (enough to completely cover the last layer of tubers) until you’ve covered them all.
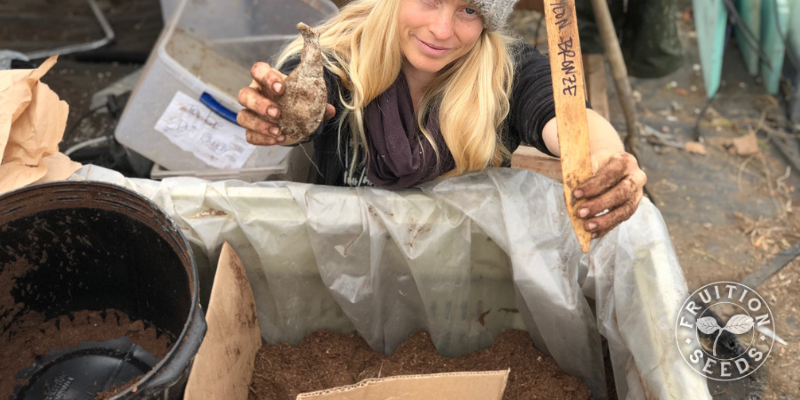
Many boxes will store your dahlias well. Just be sure to not have them be too moist or touching.
Label your box, inside and out.
Rather than covering the top of the box with un-breathable plastic, tuck newsprint so it maintains moisture but is still breathable.
8. The Perfect Place to Store Your Dahlias
Each home will have a unique place that is best suited for storing dahlias. Here are the key conditions to consider:
– as cold as possible without freezing, more consistent the better
– as dark as possible
– as dry as possible
Checking on Dahlias Throughout the Winter
Friends, it is essential to check in with your dahlias over the winter, making sure they’re neither too dry or too moist. Stay tuned for a blog later this winter sharing our secrets! We check in each month. At the very least, check them once.
Storing your dahlias each season is a labor of love, there is no doubt about it. If you love plants, love process and have a few good tips (you’re welcome!) along the way, you’re likely to love saving dahlias. Saving your own tubers is also one of the most cost-effective ways to surround yourself and those you love with beauty for years to come.
Sow Seeds & Sing Songs,

and the Many Beings of Fruition

Thank you for this information! Love your dahlia s
Hello Fruition!
First year I’m going to lift the tubers! I’m excited and quite nervous. I have 24 plants…. Wondering where might I find sulphur powder?
Thank you for so much great info, and best wishes for a restful season coming up.
Susan
Perfect timing! Thank you for this good advice!
nice directions, thankyou! btw, i’ve used the guinea pig’s cedar shavings (mixed with the peat moss or even just by itself) with great success in the past.
I have been using dried saw dust for several years now, it seems to work fine❣️🤔😄
Very helpful information. Mine are first year and I didn’t even know that they had to be dug up.
Hi. I have always used maple or oak leaves to store my dahlias in.
I dig them , put them in a banana box and tuck in leaves around
the tubers and then put ’em in my basement. this method has always worked for me.
for app. 50 years of dahlia growing. also, this has been an incredible year for growing dahlias.
more blooms than most years and still blooming strong today in late October.
This was so helpful, thank you! I hope if I follow your instructions,My dahlias will winter over more successfully than in past years.
Always enjoy your advice. There is always a pearl that helps out.
Lisa
Thank you dear for your generosity of knowledge, experience, and exuberant joy of all things nature. Will give this a try given your moral support.
Peace,
Carol
Thank you Petra. Great step by step.!!
Thanks for the Dahlia tips. Now I know why some of mine didn’t bloom this year.
Thanks for all the great information.
Do you sell
dahlia knives
peat moss
sulfer and vermiculite
Sara Burnett
sjburnett@frontiernet.net
best advice. good pictures helped explain too! Thank you.
You mentioned using peat moss that was very dry but not bone dry. Is it okay to use right out of the pressed block? Will that be too dry?
Michelle, add just a bit of water out of the block. just enough so you can sense there is moisture, but not wet to the touch. depending on how much peat you have it will take more or less water.
Could you tell me why, when over-wintering dahlias, one has to pack the tubers in peat moss (or vermiculite, wood shavings, leaves, shedded newspaper, …) ?
To allow or reduce ventilation? To keep the tubers dry or moist? To keep the temperature consistent? To stop them touching each other?
What if I just put them each in a brown envelope? slightly ventilated. Wouldn’t it be far less messy than organising all that packing material?
Hi Bill,
there are numerous ways to store dahlias. Feel free to experiment. I have heard of some people wrapping them individually in plastic wrap and keeping them cool and dark (brown paper bag) over the winter. We have found that keeping them just moist enough to not start shriveling and not touching each other to aid in airflow and prevent rotting works for us. If the conditions are too dry they shrivel and die. If the conditions are too moist they rot and die. If it is below freezing the freeze and die. If it is too warm they sprout in storage…and yes if you can plant them in time…they die. I think if you are trying to keep the system clean you could try lacking a few in a ziplock bag with shredded newspaper. Keep an eye on them. If there is condensation…vent. If they start to shrivel add a spritz of water. Enjoy!
Thank you. Yes ventilated but not drying air, moderately cold but not freezing, and definitely not touching.
I wonder if ‘rot’ spores would infect neighbouring tubers if they are only separated by two sheets of paper, ie. when stored in envelopes, which touch each other.)